The articles from our CEO Gregory Z., cross-posted from https://medium.com/@mne/experience-mind-blowing-in-context-text-processing-on-macos-using-automator-and-chatgpt-82b4ab7d5254

What if I told you that you could utilize ChatGPT to process text in any MacOS application, all with a single
keystroke? And that it would only take a mere 5 minutes to implement? It almost sounds like magic, doesn't it?
keystroke? And that it would only take a mere 5 minutes to implement? It almost sounds like magic, doesn't it?
What if I told you that you could utilize ChatGPT to process text in any MacOS application, all with a single keystroke? And that it would only take a mere 5 minutes to implement? It almost sounds like magic, doesn’t it?
Below, I’m going to guide you through the steps to accomplish this. But firstly, I want to inspire you with the opportunities that’ll come your way once everything is set up. This way, you’ll understand the benefits of the approach we’re about to discuss.
You’ll be able to select text in any application where an input form is available, hit a certain key combination on your keyboard, and within 3–4 seconds you’ll have a processed output in place of the initially selected text. This mechanism will work seamlessly in the Mac Mail app, web forms across various browsers such as Chrome, Firefox, and Safari, in command lines, in Notes, in text editors such as TextMate, and in instant messaging platforms like Slack, Telegram, etc.
What the text undergoes, how it gets transformed, enhanced, structured, and reformatted, relies entirely on you. These specifics are defined by the prompt you will specify in the ChatGPT requirements. For instance, I utilize this for quick, in-context rewrites of text messages, translating English text into Portuguese, generating PostgreSQL commands, and so much more. The possibilities are truly endless and are only limited by your needs and imagination.
Let's begin with the prerequisites:
- Apparently, you need MacOS X, because we will be using Automator for it.
- Fetch the OpenAI API Key to access ChatGPT.
- Make sure that
- jq utility is running from the Terminal (here you can find the commands to install it if it’s missing)
which jqThe following command will show you the location of the jq and whether it’s installed or not. Keep the location of it in a cool dry place :) You will need it further.
- Finally, allocate 5 minutes of your time to configure the workflow.
Automator’s configuration
Let's configure Automator to capture selected text from any text field and channel it to AppleScript for processing. The processed result will subsequently replace the original selected text within the text field. Automator will oversee the entire operation.
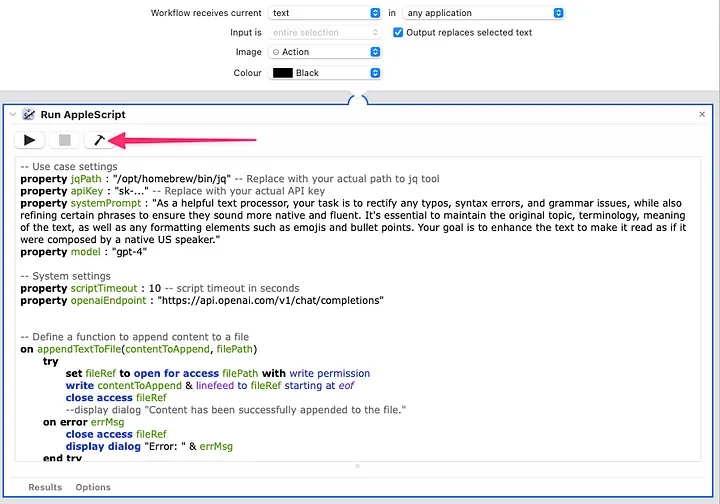
Go to Applications -> Automator
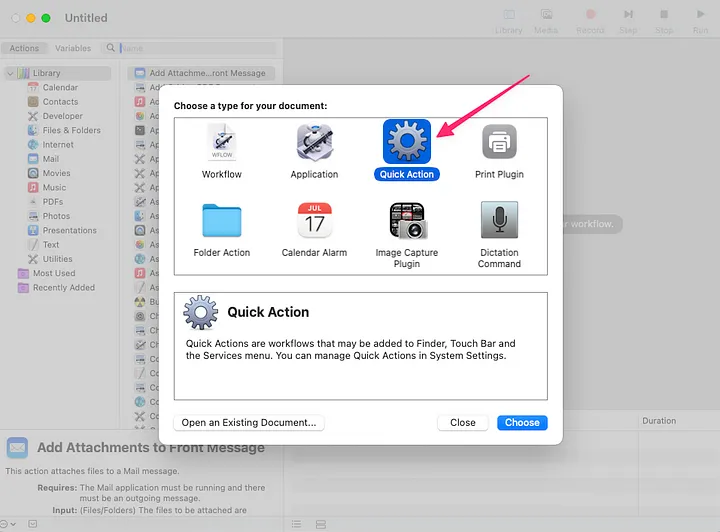
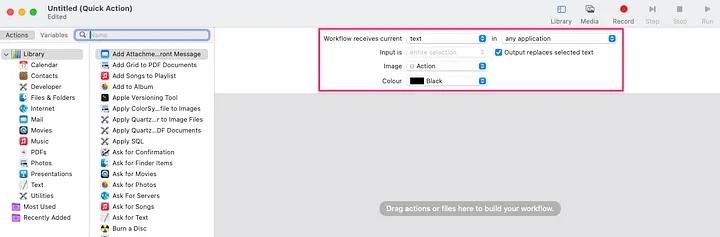
Set it up as illustrated in the image. Essentially, all you need to do is select "text" from the first dropdown menu:
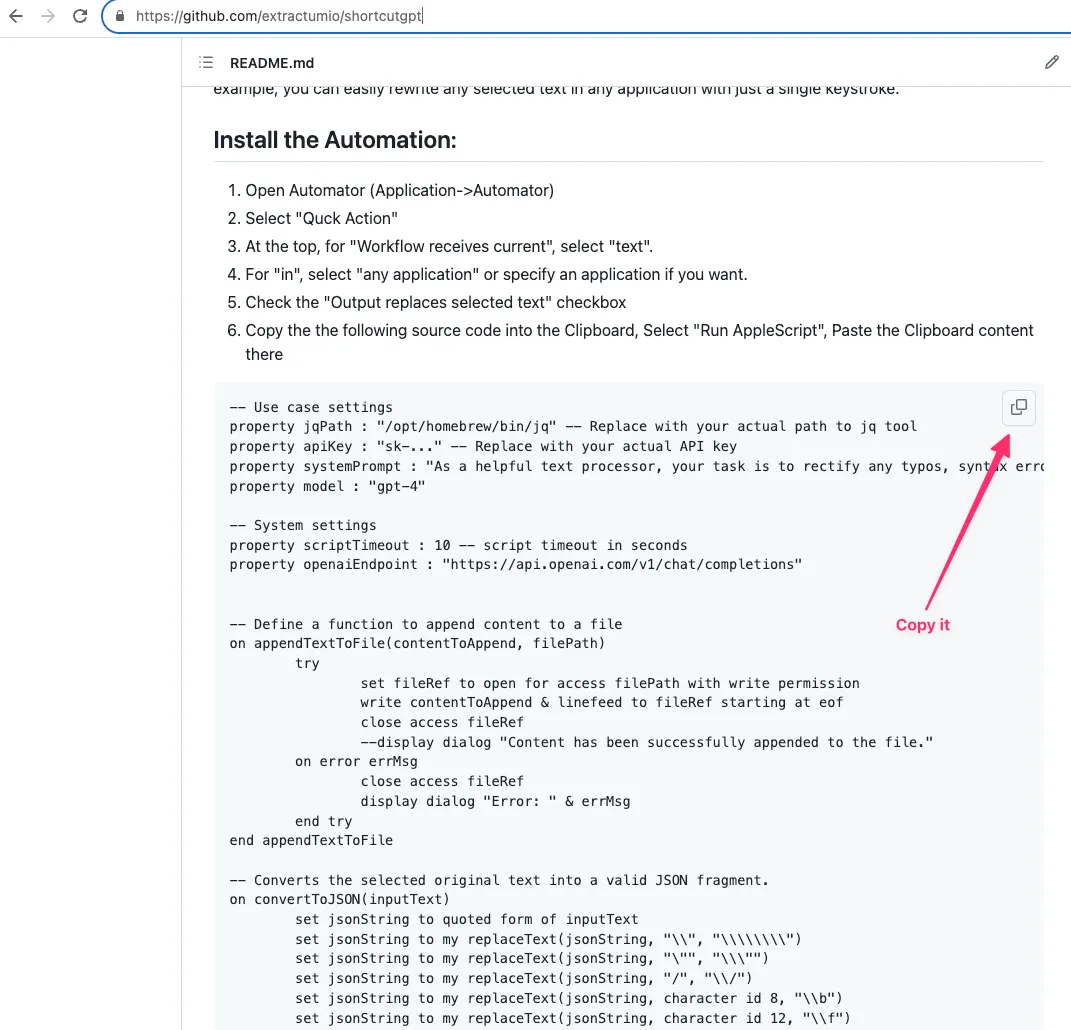
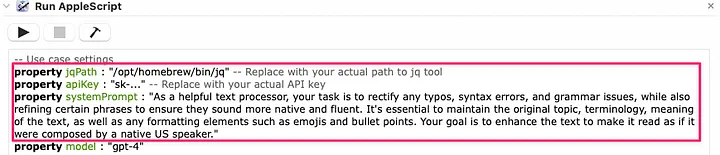
Please navigate to my Git repository and copy the AppleScript designed to process selected text to your clipboard:
Go back to the Automator's UI and paste it into the script area:
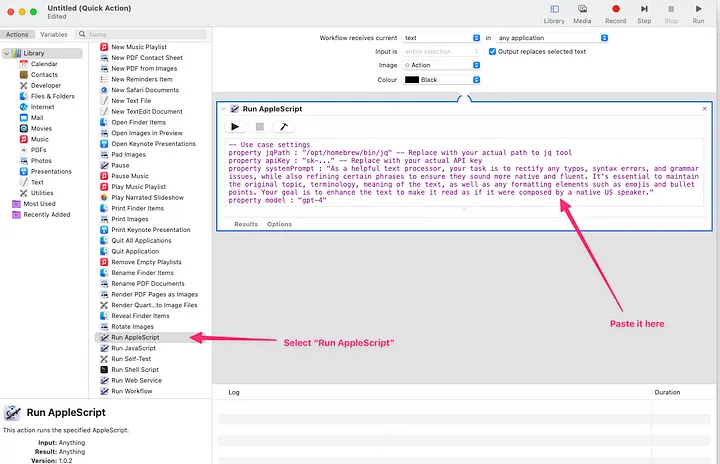
To locate the "Run AppleScript" option, utilize the search bar at the top and begin typing "Run A..." This will help direct you to the required setting more quickly. After you've found it, paste the Clipboard content into the designated script area.
Click the icon to verify the syntax. Upon doing so, it will transform into a syntax-highlighted code snippet.
Now you need to replace a few first lines with the actual values: specify OpenAI API Key, the path to jq utility, and alter the system prompt for ChatGPT if needed.
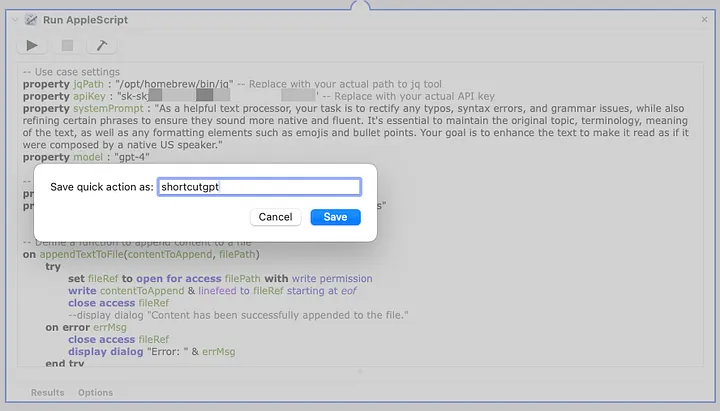
Once you've completed these steps, go ahead and save your service in Automator using Command+S. Let's call it "shortcutgpt", but feel free to choose any catchy name that appeals to you.
The hardest part is behind us. Now, we need to set up a keystroke so that we can run it from anywhere.
Adding a shortcut
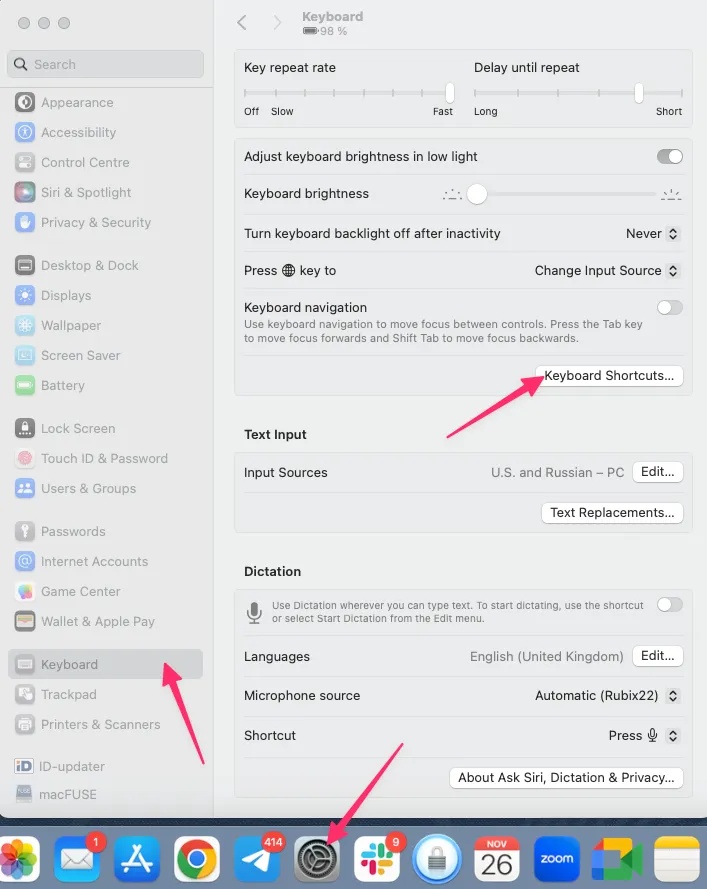
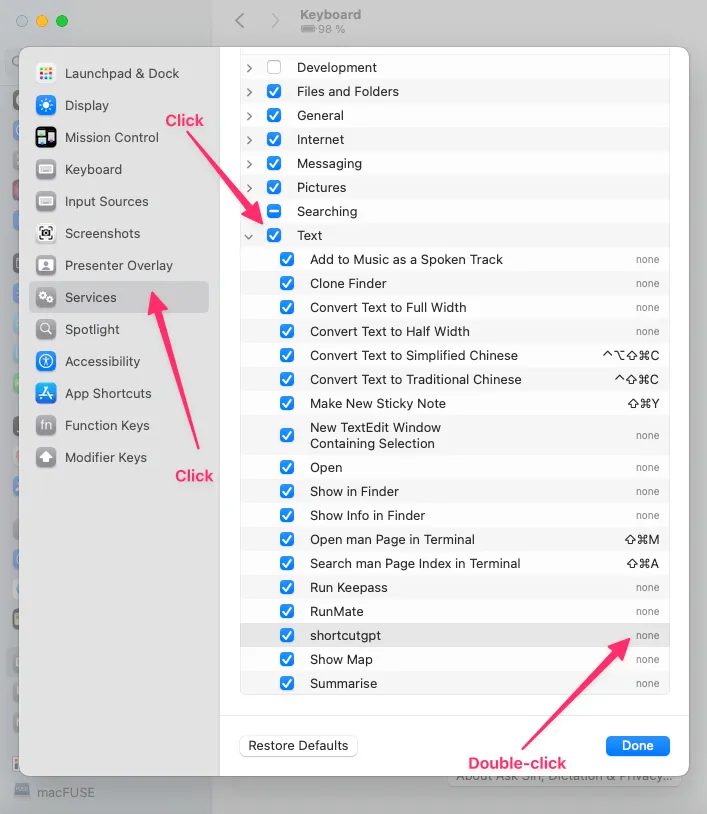
To create a memorable shortcut, double-click on "none" and then enter it. I am going to establish my shortcut as Command+Shift+0.
Press “Done”.
We're all set. Let's see how this works. Navigate to Slack, type something into the input form, then select it. Press Command+Shift+0, and observe the result.
Now press Command+Shift+0 and voilà.

That's it! I'm sure you can devise more sophisticated and creative applications of the method I've described.
If you find my project useful, please consider giving it a star on Github https://github.com/extractumio/shortcutgpt or sharing this article.
Troubleshooting
There might be a few issues regarding the setup, so if it’s not working for you, check it first:
- Ensure you specify the exact location of the jq tool, as it is utilized to parse the output from the OpenAI API. You can retrieve the absolute path by using the 'which jq' command in your Terminal. Once you have obtained it, insert it into the first line of your AppleScript.
- Ensure that you input the accurate OpenAI API key into the AppleScript.
- Before attempting to execute the automation using a keyboard shortcut, consider running it through the Service menu first. You can locate this within the application menu under 'Services'. If you're using Slack, you'll find it here:
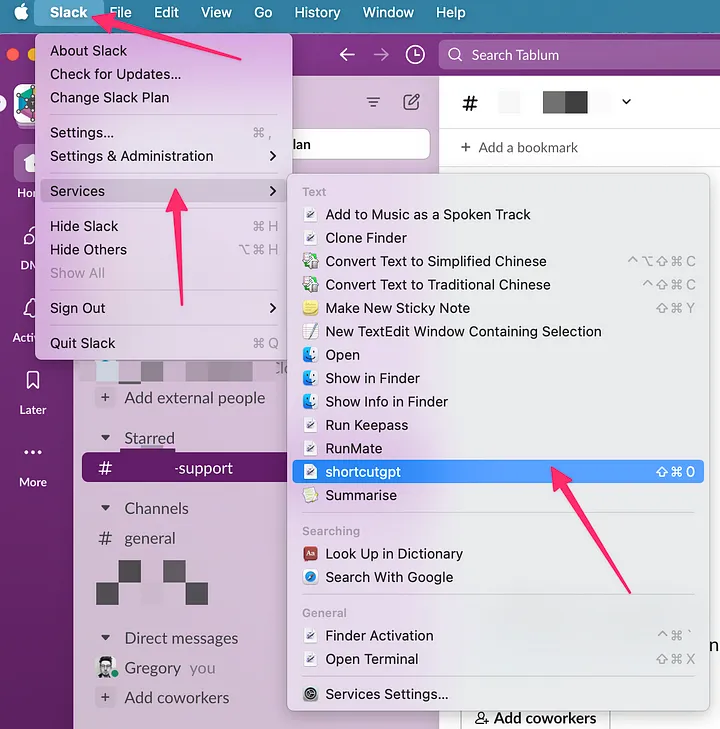
If you only see a few items here and not the "shortcutgpt", it means you haven't selected any text in the input form yet. It will start showing up once you select text within the app.